| < Project settings | Editing documents > |
Creating, deleting and moving documents

The project's document tree
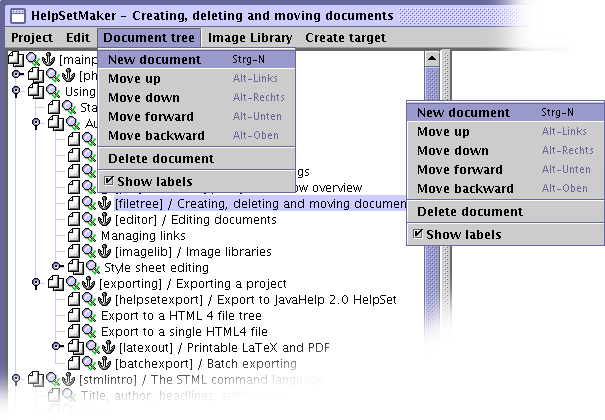
The overall structure of the document tree in the help set is controlled through the document tree on the left side of the project window. Here you can
-
Add new documents to project.
-
Move documents to a new position.
-
Delete documents from the project.
-
Get an overview about the projects.

Entry line in the file tree
Each document in the project is described by one entry in the tree. The lines can have up to nine entries:
-
The tree opener is always available and can be used to hide and show the subdocuments of a document.
-
The document icon represents the document. If there are no subdocuments, it shows a single sheet of paper (“
 ”), otherwise multiple sheets (“
 ”)
”) -
If fulltext search index creation is enabled in the project settings, the looking glass symbols indicates whether the document is included (“
 ”) or not (“
 ”) in the index creation. Exclusion of a document from the fulltext search index creation can be controlled via the document options.
 -
If the document has a label and is therefore referentiable, this is indicated by an anchor symbol, “
 ”.
”. -
Integrity checking can lead to up to three warning symbols shown next to the document name:
-
“
 ” with the red circle indicates that the document contains a link to a non-existant image.
 -
“
 ” with the orange circle indicates that the document tries to link to a non-existent :label.
 -
“
 ” with the pink circle marks documents which have non-unique :label definitions
Integrity checks are normally performed instantly during document creation. It is also possible to run them as a batch through the project's “Edit → Check project link integrity” menu. Checking for non-unique labels is a little bit more expensive than image and hyperlink checking. It might therefore be turned off for the automatic integrity checking. In this case, the “
 ” alerts are only updated on explicit integrity checks. Find more information in the section about link management.
 -
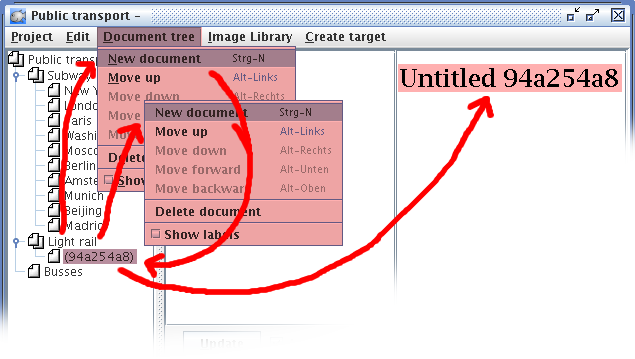
Documents are created by selecting a document, opening the context menu by clicking with the right mouse button and selecting the “New document” menu option. A new document is created immediately as child of the previously selected one. In this stage, it is untitled and therefore temporarily identified by its filename.

Newly created document without title
You give the document its real name by editing the file content.
Moving documents through the hierarchy
You can move any document freely through the tree hierarchy. Two different types of movement are possible:
-
“Up” and “down” move the document through the hierarchy levels. “Up” moves the document one level higher and places it actually beside its former parent. “Down” goes exactly in the other direction and makes the document the last child of its former neighbor.
-
“Forward” and “backward” move the child within its hierarchy level. “Forward” places it one position more apart from its parent document, “Backward” moves its nearer to the parent.
Note
You can move the documents very conveniently using the cursor keys on the keyboard. Just keep the ALT key pressed and use the four cursor keys to move the currently selected document through the document tree.
Deleting documents
Documents can be deleted from the tree by selecting the appropriate menu option “Delete”. This deletion is final, after that it is not possible to bring the document back. Be aware of what you are doing, you have been warned.

Deletion warning, take this seriously!
You will only be able to delete documents without any children. For documents somewhere in the middle of the tree, the delete operation is disabled.
Warning
Once again: Deletion of a document in the tree deletes this document physically from disk. If you do not have a backup, it is finally dropped. Be careful with this option!
| < Project settings | Editing documents > |